Sunday, February 28, 2016

Handmade Braintan Drum Pincushion

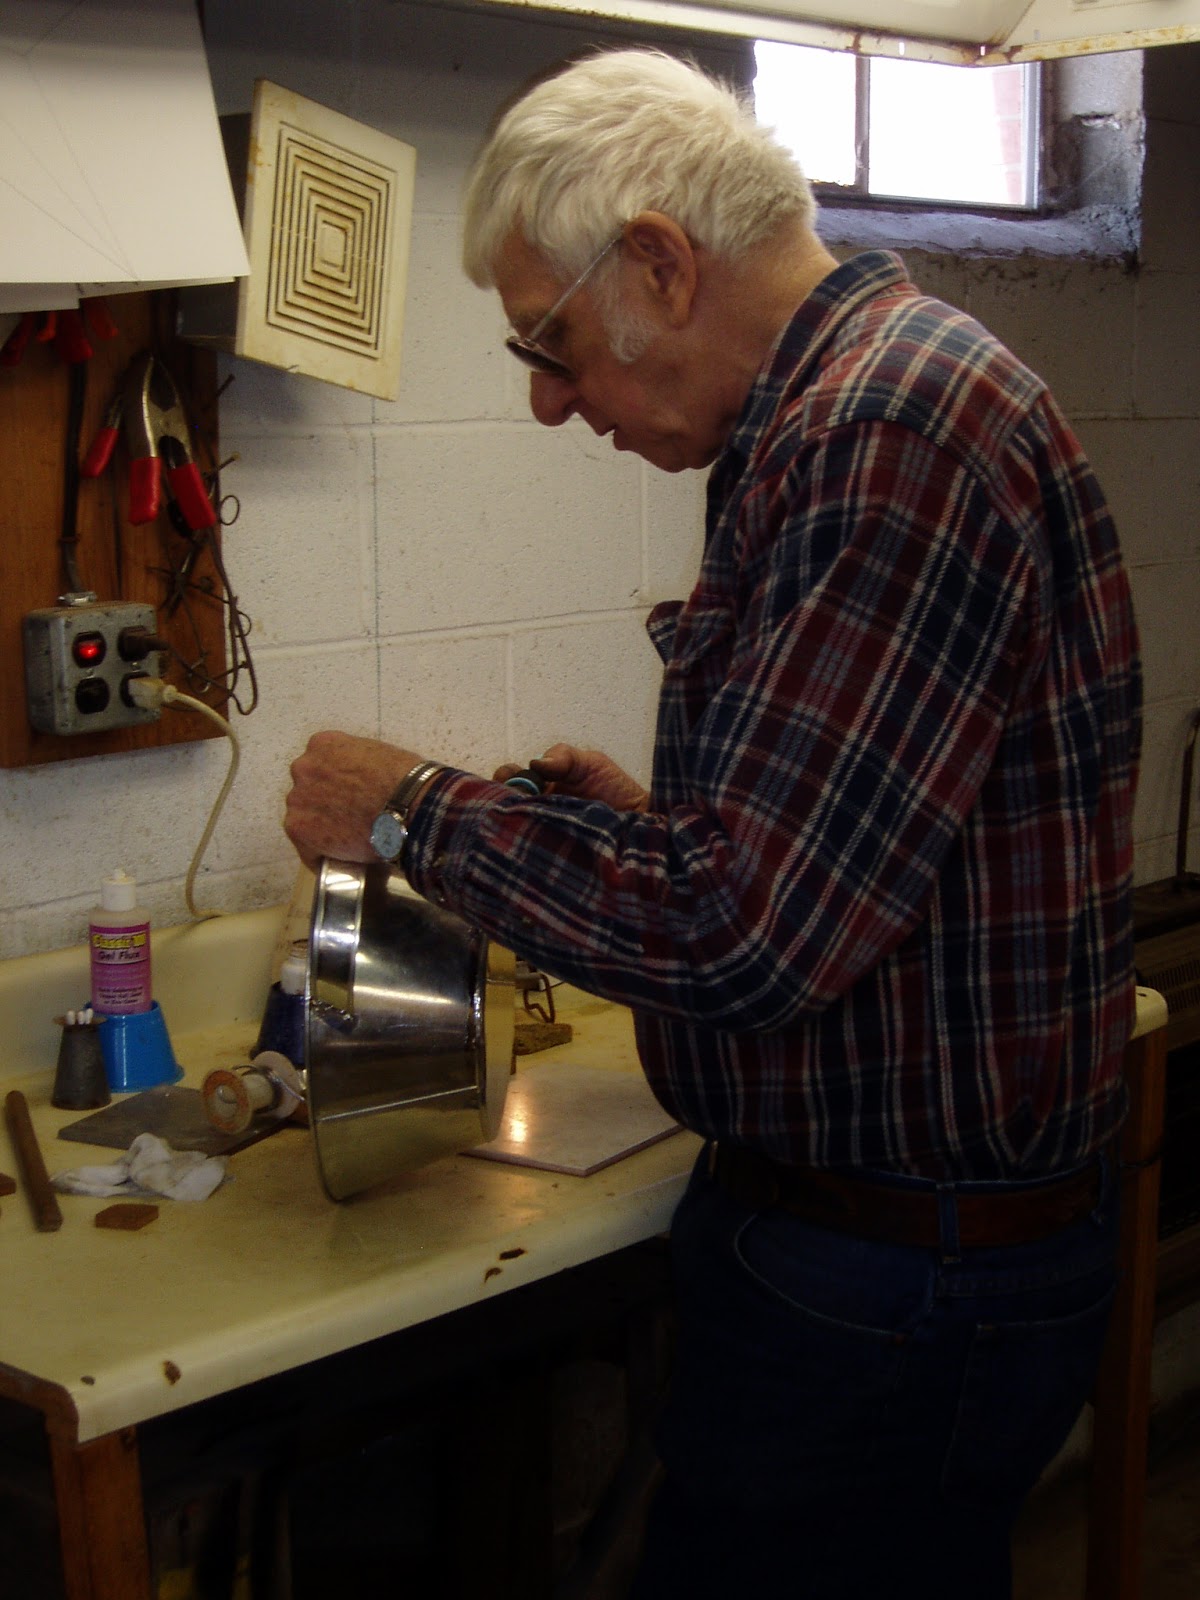
Years ago I saw an ad in one of the Interweave Press Pieceworks magazines for a pincushion contest. As usual, my brain fired off an image of something totally different than what they were asking for, but I thought why not give it a go. What could it hurt? So I let the idea roll around in my head till I thought I had a workable idea. I then made a phone call to my Dad, asking his advice. Was my idea even doable? He thought I could do it, and offered to  make the tinwork for me, but was more than willing to help me once I said that I wanted to do the work myself. Now I had to block out a time slot in my schedule to spend a day in Dad’s tin shop to make the first step of my “pincushion”. What? You ask, why in the world would you need to work in a tin shop to make a pincushion for a needle work contest? But when making a mini drum you need a form, yes, usually the hoop is wooden. But since my Father has a tin shop it would be easier and more fun to make it out of tin. Basically I made a tin can, with a lot of little quirks added to it.

I wanted both sides of the drum to be filled with raw wool because that is what was used in pincushions years ago. Running the pins through the raw wool coated them with a thin layer of lanolin which caused them not to rust from the moisture in the homes.  Yet I also wanted the drum to have some weight to it. Just a can filled with wool would easily side around on your work space. To fix this problem I had to create an area in the middle of the can that was sealed and would hold the sand that would give my mini drum weight. Another personal touch to the can was using a tool from the tin era that had been lost until my Dad drafted up the design and had a few of them remade. I got to choose a simple but decorative design of ridges that run around my can. This could be done the hard way, but by using the tool Dad had remade it was easy. (Extra cool! Dad) The last step to the can was to pre-age it so it didn’t look shiney and new, but had an heirloom look to it.


Now I had to design the drum’s top. I wanted the top to have two colors of braintan arranged in a pattern. I pieced it together and then took blue wool sock yarn and did a simple embroidery stitch over the top of the seams. Now for the very center of drum top, a very small beaded rosette in red and white beads gives it a special touch while also covering the area where all my seams come together and could damage a needle if it was forced through them. The bottom piece of braintan is the very same size and shape as the top only it is all one piece.


Most drums have a cord or leather thong that laces through the top and bottom as it travels around the drum. I wove a mini, chevron finger woven strap made out of red, white, blue wool sock yarn to use on my pincushion drum. I tell myself this is because I wanted to add color, but I am pretty sure it was just to keep the project as difficult as I could. ; ) The finishing touches where adding a feather and a few brass beads.


Yes, I did send it in to the contest. lol They probably had no idea how to “grade” it. My drum pincushion arrived home again with a nice letter stating I didn’t make it into the few top spots that would be recognized in their magazine. No surprise to me really.

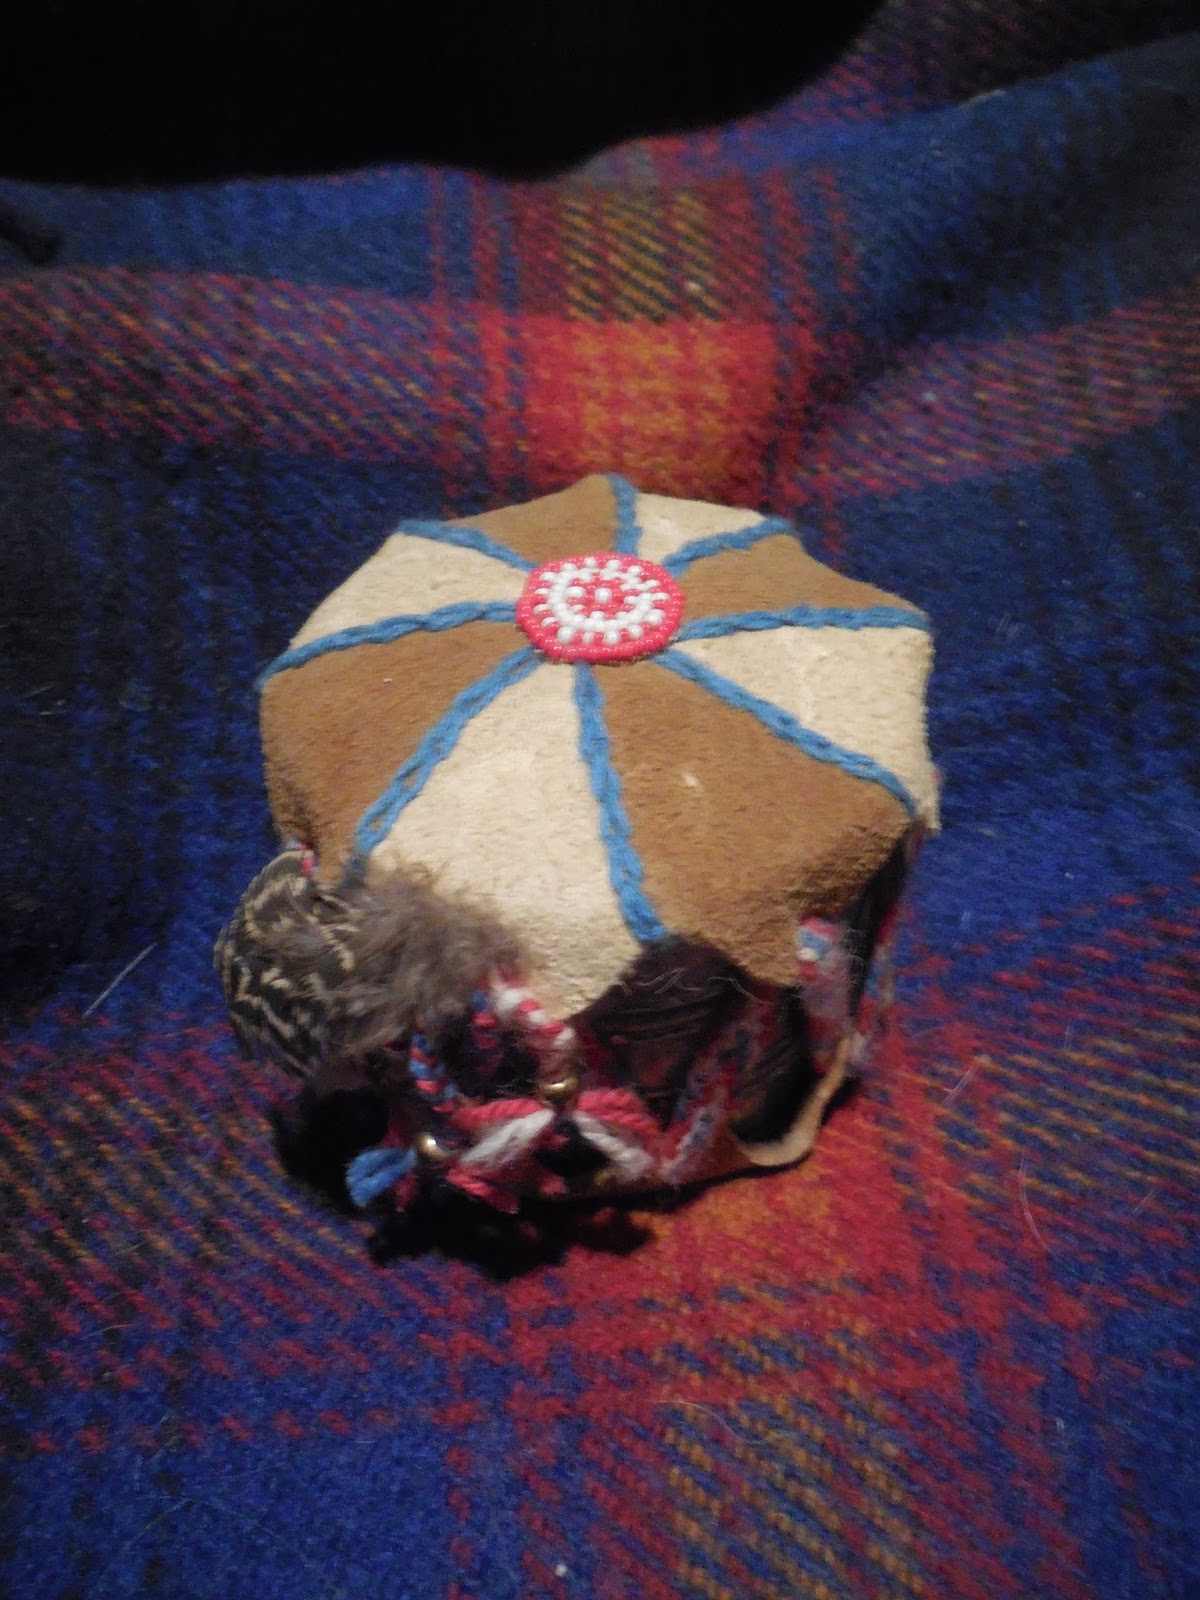


Today as the loss of my Father is very fresh in my life, (The evening of the 7th of February my Dad took his first stroll in heaven.)  I look at this mini drum cushion which brings sadness, yet joyful memories of a life long relationship with a man who taught me so much. Thanks Dad for believing in me and giving me the confidence to follow my own drum beats.


Saturday, February 27, 2016

Snow Humor


Ah, creativity comes in many forms. One of my children built these in such a way that his father had to pass them on the way to the shop. We all got a good laugh out of it. I hope that by sharing it, it brought you at least a smile and brightened your day too.

Tuesday, January 19, 2016

Knitting From Christmas Past


Years ago when  the hands and feet of my children were smaller, knitting went so much faster. I had gotten a bunch of wool yarn on sale and decided to make all my children new mittens for Christmas. As usual it started out to be a simple pattern, but ended up much more complex with each one having their own pattern. I started out making the oldest child’s mittens first. I had to work through the “kinks” in the pattern and in my record of row keeping. Basically, in simple English, that means I turned out two mittens the same yet different sizes. Being the wonderful daughter she is, my child proudly wore them and loved them in spite of their imperfection. Lucky Mom! Unfortunately this is not the only time I have done this to her. The last pair knitted were for my youngest. Knitted one and went to get more yarn only to discover that I was out of red. (Had one less ball then I thought.) What now? Why just make the second one a different color of course. Who needs matching mittens anyways? If any of my children ever strike someone as being “different,” it might just be their mother’s fault.

These are old pictures. Please forgive the bad, shinny backgrounds. I've come a long way with my photography skills. lol There is still lots of room for improvement though. Ever learning is my motto.


Friday, January 15, 2016

21 Century Braintan Backpack


I know that many people use braintan leather for re enactment clothing, and historical projects, but sometimes it is just plain fun to bring its use into the 21 century. After watching colleges and businesses give away simple backpacks for promotional advertising and also seeing them sold at stores I got the “why not” idea of making a similar style backpack out of braintan. Of course since it is made out of leather and braintan at that, fringe became a necessity. While I am at it, l twist the fringe for a cooler look and braid a one of a kind braintan strap for it too. There are a few things I would do different on the next one, but I really like this bag.  I would of loved to bead on it, however, that would of drove the price so high I decided it was best to keep it simple. In fact it is supposed to be for sale, but I keep eyeing it up for mine. ; ) Either way is ok, because I can always make another. Wouldn’t you want one?

The second picture shows the true color, but the other pictures show better detail.


Thursday, December 31, 2015

Knitting to Help Santa 2015

This year I thought I had Christmas covered, but certain events happened and I realized I was short of both gifts and money which over the years has occurred many times in my household. So since yarn, knitting needles, and ideas abound in great quantities at our house, it was knitted gifts to the rescue this year. Fingerless gloves and mittens seems to be the craze, and I know my tech loving daughter at college would probably enjoy a pair. Off to search for a “simple” pattern and to take a gander at what yarn can be found in my stash. Picked the pattern from the every expanding raverly.com. pattern base. Careful! It can be like falling down a rabbit hole. http://www.ravelry.com/patterns/library/cozy-cuffed-mitts was the winning pattern. Fairly simple because I don’t have to knit each and every row different . Been there done that. Found many, small tattletale (Can see they were spun on my Jenkin’s Turkish drop spindle.) balls of mernio single ply that had been spun years ago before I had a wheel. Somehow being some of my first spun yarn they never “looked” good enough to be used, but they jumped to the front this time because my color choices have thinned out some.  Plied some of them with a white wool and some with a gray wool I’ve spun recently, and Wow! Even my youngest son who help me run my ball winder was committing on how nice the yarn was. As usually there were sessions of knitting both forward and backward, thankfully knitting forward occurred more often. They were finished before Christmas and I tried to convince my daughter that since I knitting them it was her job to tuck the yarn ends into invisibility. She laughed at me and said, “But Mom, they are MY Christmas gift.” Guess who ended up tucking them in?


The mitts turned out well. They are a little big for her were the mitten and cuff meet, however considering she wasn’t here to try them on as I knitted I am pleased with them.  The major thing I would change if I made them again would be to use a thinner yarn, I wished the whole way through knitting the mittens I had double plied the yarn instead of triple plied it. Mainly just because she didn’t need a heavy mitten for sprinting between buildings at college.

Ah! Once started down a course one must finish it, a second pair of fingerless mitts were needed for her sister. Not being smart enough to choose the obvious and quicker method of knitting them both a pair from the same pattern, it was back to the raverly pattern search. http://www.ravelry.com/patterns/library/scrappy-mitts was the chosen one, this time for two reasons. Reason one, my daughter had always told me she didn’t think she would like fingerless mittens because she dearly loves the knit each and every row different cable mittens that I made her, so these would make her smile and at least reach for them in fun. Reason two, they used little bits of different colored yarn which worked well with what was in my stash. I cast on and started knitting. Agh, only eight rows in and the can’t follow a pattern disease hit. Thus her mitten ended up based on the above pattern (which is well written), but entirely different. Needless to say I learn my lesson and tucked my own yarn ends in on these mittens. I mean why waste the breath to ask when you know you are going to get the look. ; )


Wait, there is yarn left over! A matching hat is always a good idea, so I made up my own hat pattern based off the mittens I made her. Finished it off with a little button on top, and reminded her she was loved as I tucked in all the yarn ends.  The occasional dreaded compliment was spoken. (Look out Mom! Cover your ears.) Hey that is cool. Can I have one? At times like these having a smaller number in the family tree would be handy. But what can I say, I would like one too.


My boys are not impressed with fingerless gloves. What good are mittens or gloves with the ends open? So I decided to knit my youngest a hat.  I tried the searching the ravery.com pattern base again. Just couldn’t find what I was looking for, so it was time to ask for help. Someone suggested the bun hat. (With that name I would of never found it.)  http://www.ravelry.com/patterns/library/bun-hat. I tried to start knitting it at night. Nothing was going right, too tired, so off to bed. Spent the next morning undoing the previous nights attempts so I could start fresh. Made a phone call to a fellow knitter for advice. (She keeps me in line.)  Finally, I wrapped my brain around how to enlarge the pattern. What fun this pattern was. My son picked out the design he wanted knitted into his helmet and we graphed it out. He also asked if I could put a red plume on top of it. The end result just makes me smile and causes a rousing, battle cry to silently rush through my head. Can you tell this hat was made for a child by someone who inner child is not buried very deep?


Oh by the way the gray wool is 3 ply hand spun Finn from our flock, the red wool is a from my stash and silver is a shiny, slippery yard sale find. (Not fun to knit with!) I balled six small balls of it on my ball winder. Putting each ball in a different zip-lock bag with an end sticking out. Took the bags to my spinning wheel and over spun it to get it thick enough. Put the six ply ball in it's own zip-lock back, and let  about two feet out to untwisted as needed. Pretty sure being willing to do that means I might be crazy, but the end results help make up for it's knitting difficulty.


Monday, December 28, 2015

Braintan Toting School Gals


At some point in your life you must admit that your family is different and there are no others like them. This has probably happened to my children many times over the years, but I am certain one of the times was when my daughter came home from school and told me she needed a book cover for her math book by a certain date. For whatever reason an image of a patched leather book cover popped into my head, though a more normal mother would of got the image of a brown paper book cover or at least something along those lines. But no, I could not shake the image of a leather cover, so off to check my braintan leather scraps supply. I measured, cut, stitched, fringed, and thought I had it right, but no, some of the leather stretched. Grrr... now what? Buttons to the rescue. The end result was a one of a kind, never to be recreated braintan leather book cover that she used all year. Nothing like your mother helping you stand out in a crowd.

 My daughter told me that she liked it, and got many comments on it. Since it would not fit any of her books the following year, she  reluctantly handed it down to her younger sister for her math book that year. At the end of the school year I thought we might have to donate it to the teacher because it would not fit another book, but my younger daughter found a book on her bookshelf that was a close enough fit. Needless to say I have made many braintan leather book covers, even beaded ones, over the years, but never another patched one. Hopefully they will remember their years of toting a braintan book cover through school fondly and know that their mother loved them.


Sunday, December 27, 2015

A Basket of Buttons

This project was born out of a need for a Vacation Bible School craft and a love for buttons. I truly wish I had pictures of button baskets that the children made that year at VBS, but someone else took the pictures of them. Somehow I never manage to get a copy of them. We had close to 150 children make a simplified version of this. Each one was as unique as the child that made it. My poor craft helpers spent hours helping sort, bag, and prepare over 50 pounds of buttons before the children every got them, and my dear father got roped into drilling the holes in the all the wooden bases. We had some good times of fellowship over those buttons, however many of them I fear thought that their leader was over ambitious, crazy, and total unrealistic of what the children were cable of doing. (They may have been right.) The kids on the other hand loved the challenge and thrived on my belief in them that they could do it.   
 
I have taught adults to make these too. It is always a fun class full of laughter and amazement as each individual basket takes on it’s own design. No two ever turn out the same.
 

This particular button basket was made specifically for my mother. I used copper wire instead of the floral wire used in the VBS baskets, and I also chose to use a nicer base.  A major part of the fun in making one of these baskets is in the choosing of the buttons. The possibilities seem endless. Using all white and older styles of buttons on my mother’s basket gave it more of a classic look.  Basically, she ended up with another pretty knickknack to dust instead of a woven basket with many possibilities of usefulness.