Sunday, May 8, 2016

Finger Weaving Tidbits and Images


Every time someone sees one of my a finger woven projects I am asked the same questions. "How did you learn to do that? Who taught you?" These are simple questions, but the answer to them are never quite so simple. If I am honest, I say, "I really don't know," and then I get an interesting yet varying array of looks.

But the truth is, I really don't know. I braided horse manes, my hair, cords, and yarns, and even did Macramé as a kid growing up. Somewhere in that mix up maybe I learned, but I don't ever remember doing a project with it. When my husband brought me one of his first braintan hides, placed it in my hands, and asked, "what do you think of this?" I replied that I would love to braid with it.


After actually braiding the leather, doing some research, and showing it to others, I realized what I was doing was called fingerweaving. I searched out and bought several books on the subject and through them, I've studied how others do it. The resources share that in Canada, many years ago, they secured the strands at both the top and the bottom before braiding. Curiosity about this drove me to connect with a fingerweaver in Canada and ask if he did it this way. His answer was yes. Hmm... that is not how I do it.
After reading another book, the author's way sounded so complicated that I gave it a half-hearted try, then shook my head, and went back to my way since the results look the same. There are still a few books out there on fingerweaving that I would like to buy because they are not something my local library carries. However, I am not sure just when or if I will pick them up. I can get good results fingerweaving, so I am always pulled to buying books on other subjects that interest me first. Somehow, I always run out of that green paper stuff that people want in payment for their books, before I run out of books on my bucket list.

The books have helped me stretch and reach out to try different patterns other than the basic diagonal fingerweave which comes so naturally to me and is my favorite to do. But some of the other patterns look cool enough that they are worth the effort.


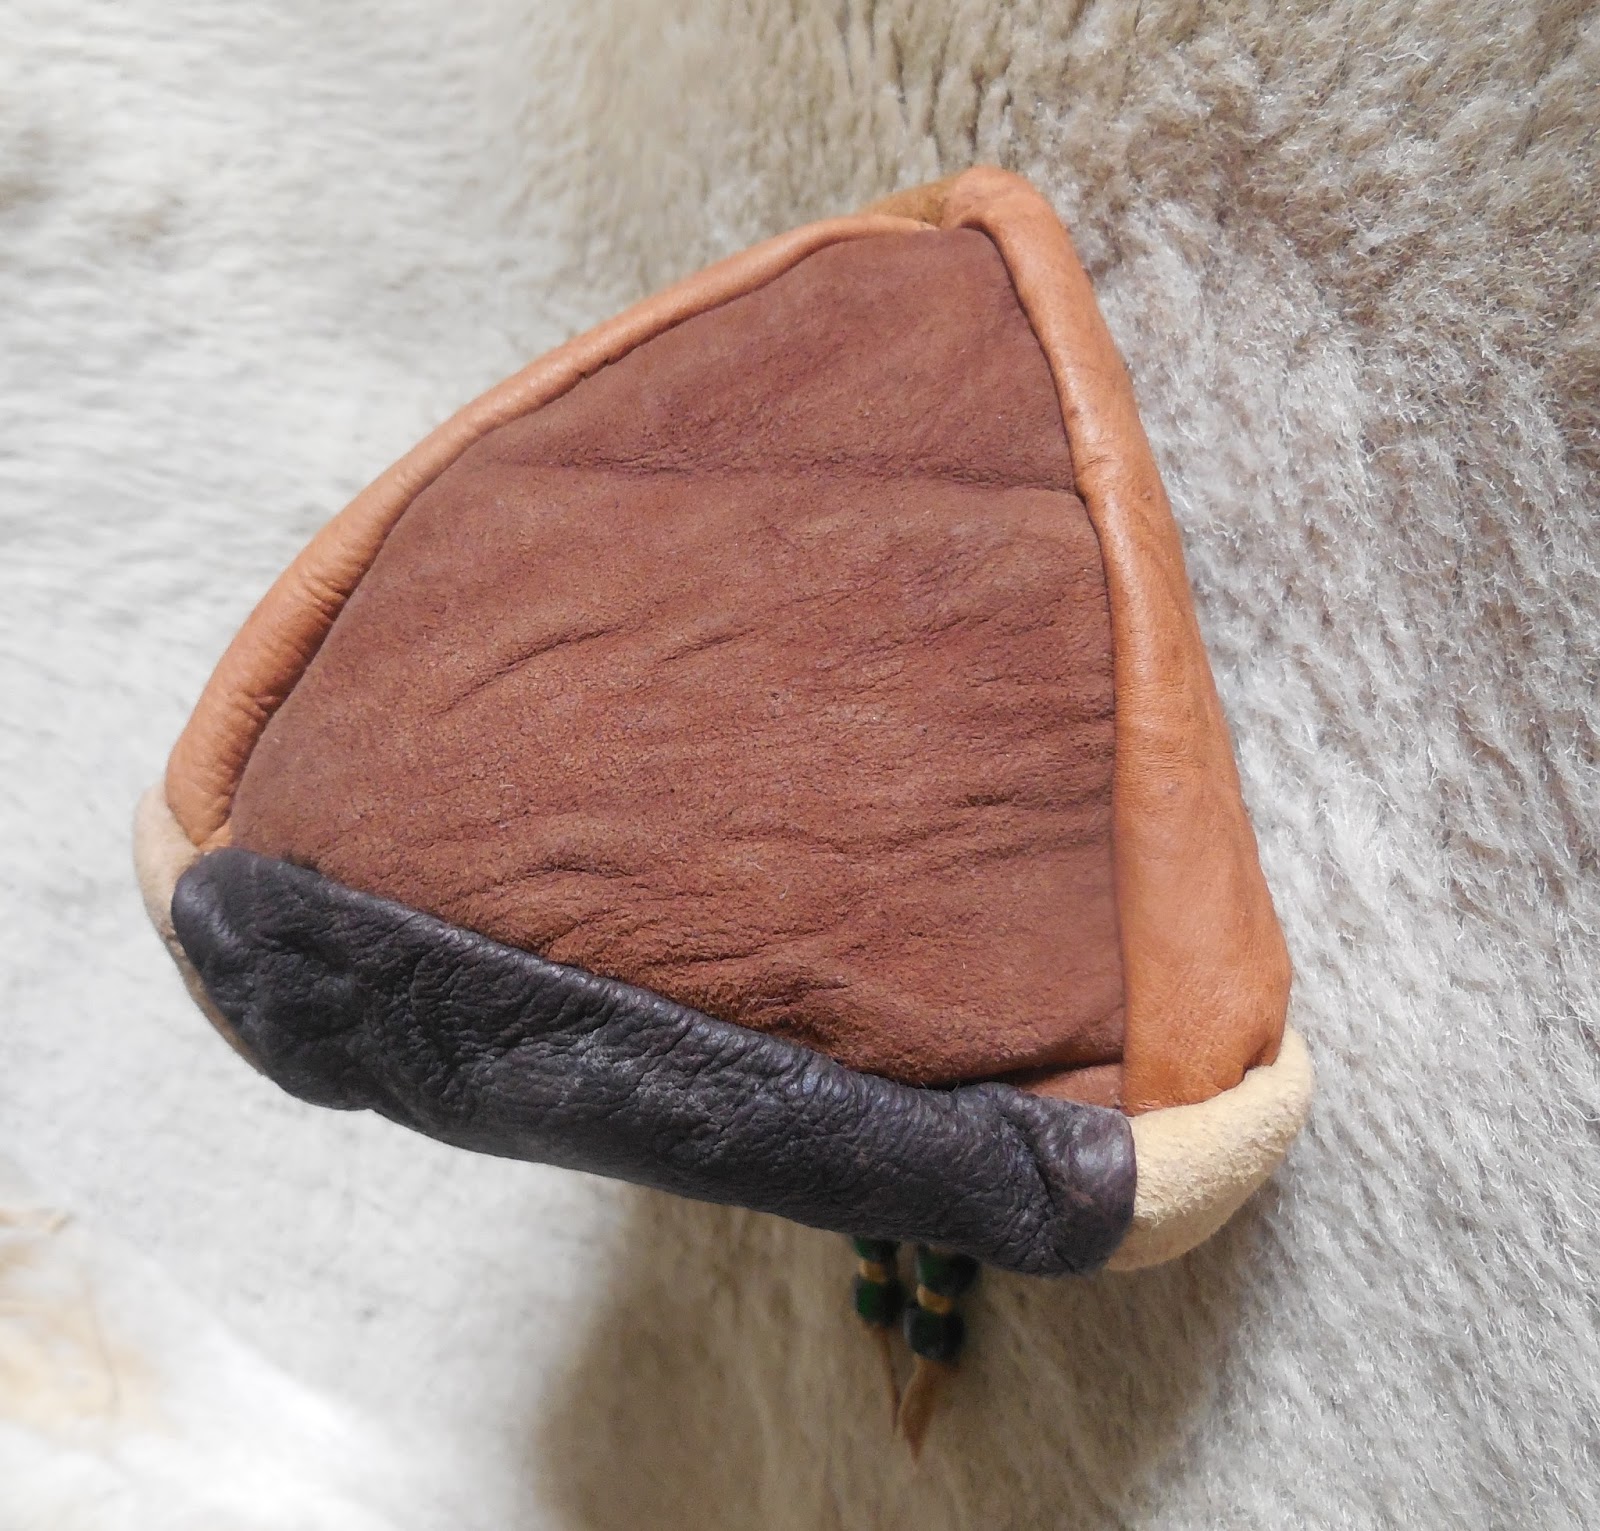
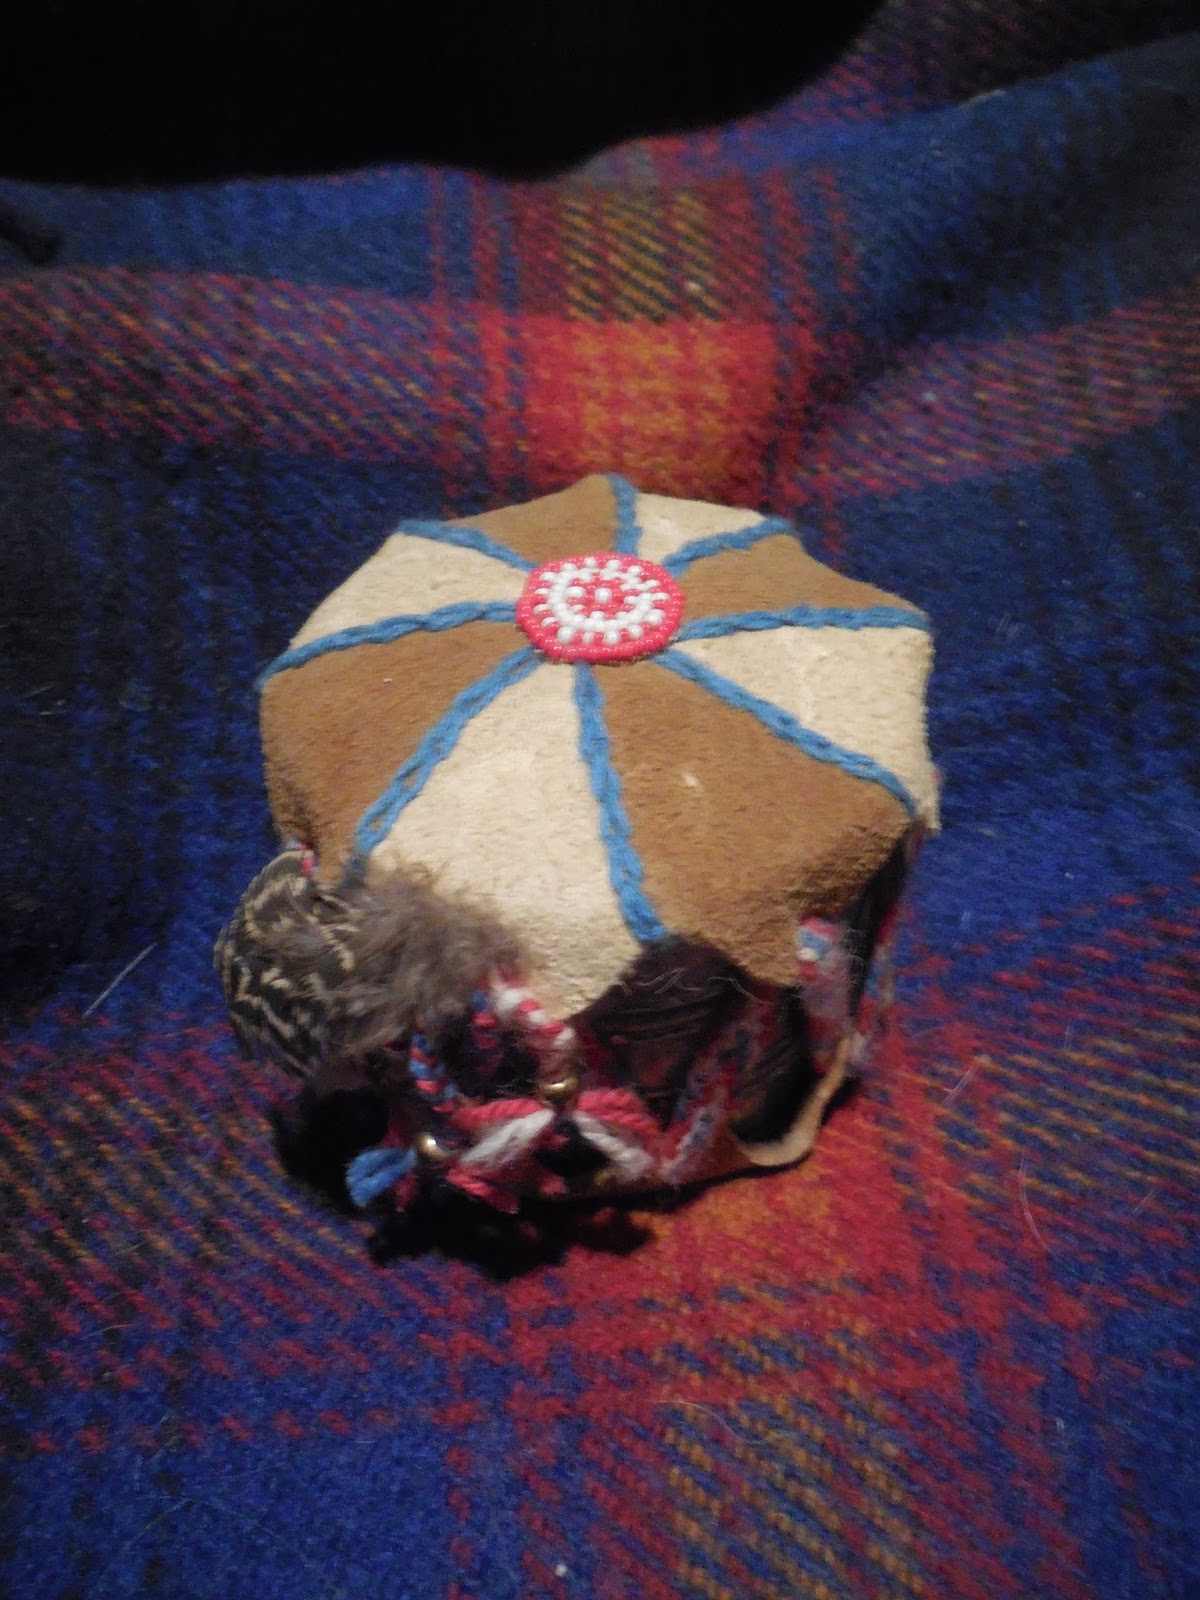
The following are a few pictures of some of  the many different things I have fingerwoven. I tend to have my own style, and often mix leather with wool or braintan leather with bark tan leather. Are you surprised? ; ) A couple of times a year I will fingerweave a small sample project out of yarn so that I don't forget how to do different weaves. It may not be perfect, but I want to do enough to know that I could pick it back up when needed. Unlike my beading projects, where I often feel like I let too much time pass between them so that I am constantly relearning the same things.


Monday, May 2, 2016

A Small Catch of Felted Fish


Enjoyable! Pure fun, that is what these fish are. I actually have no idea how many of them I made, because I gave so many away. All the stages involved in making this fish are delightful. This project started because I wanted to learn to knit with more than one color. I figured that a knitted toy would be a safe project because even if it wasn't perfect it could still be loved. So the pattern was bought, the needles found, and the 100% wool yarn chosen for its felting ability.


The total freedom to mix and match bright colors in the fish was exhilarating. Added to that was the ability to change colors whenever I felt like it. I tried many different two color patterns, liking some enough to use again and only doing others once. I even made a mistake when doing the tail that I reused in designing other fish. It made the fish tail much fuller and more fan like.

Because you felt these fish they are knitted bigger than you want.  You then add them to your washer with a load of towels being washed in hot water. I loved letting the children put the fish into the washer themselves, and also letting them find the fish in the load of wet towels that was taken out of the washer. Their eyes would grow big as they realized the fish had shrunk in the felting process. Many big fish were knitted and given away to friends so they could have the fun of felting the fish themselves with their own children watching.


The last step is stuffing the fish. Usually this job went to the children. Their small fingers work perfect for poking stuffing through the fish's open mouth until it went from a flat fish to a plump fish. Usually much giggling went along with feeding the fish in this manner.


A optional step was to add eyes so that the fish could see the child who love it. Buttons worked for this as did just some yarn and simple embroidery skills. Whether the fish had eyes or didn't seem to matter to the children who loved them. They would often run off with them before I had a chance to get the eyes made.


My goodness, I think of have talked myself into digging out this pattern and making some more fish. I wonder if my children would think they were to "old" for felted fish fun. Ah, maybe you are interested in making some too. The pattern can be found here. http://www.ravelry.com/patterns/library/felted-fish
Though I bought mine through a yarn shop so you might be able to find it in one too.


Tuesday, April 12, 2016

Weaving for Bears


These pictures are years and years old. As I look at them I am pretty sure they are from another era of my life when the children were small and projects done at home by ourselves were satisfying. These handmade items were woven by my children for the very bears that model them.  Easily contented models are such a blessing.


All were woven on a little Brio weaving loom that I picked up off Ebay, I think. I had it for years and the children had done many projects on it when a weaving friend stopped in and said the magic words, "You know that loom folds up right?" No, I did not.  It was shipped to me unfolded and I never thought to even check if it would fold. lol What an extra blessing that is! It stores much easier, and with less chance of damage. Of course now the children have moved on and are no longer concerned about dressing teddy bears. The little loom sits quietly folded up on the shelf now, but hopefully the memories made beside that little loom will last a lifetime.


Wednesday, April 6, 2016

Hometanned Leather Jester's Bag

Ideas can be good and they can be bad. At one point this last year, I dreamed up a way to make a leather bag from seven triangles. They were all the same size however each triangle was a unique leather differing in bark tan or braintanned, and smoked, or dyed color. Sure, it is a one of a kind bag. Not practical, but an oddity that I can use to show people some samples of my husband’s tanning.

Front View


I can honestly say it wasn’t one of my brightest ideas. Hand sewing the triangles the right way was a bit mind boggling once you got so many together. Also, figuring out a good way to close it required a few days of pondering, but is a quite simple procedure. However those challenges were meet and conquered. (Patting myself on the back)

Back View


It reminds me of something that would belong to a jester. Being creative is good, but there are also many ways in which it backfires on you. Somehow I don’t think that my hometanned triangle jester’s bag will ever make it as profitable selling item, but I might be surprised. Life is strange like that. Actually it is quite roomy and in all these pictures it was stuffed with two Walmart bags.


                                                           Bottoms Up


Can I at least get brownie points for creatively using up my leather scraps? lol


Thursday, March 24, 2016

The Sweetness of Spring (maple Syrup)


It has been a few years since my family has really made maple syrup. Oh, we played at it by tapping one tree--just enough to show my children how it was done and give them a chance to taste the “genuine nectar" which also caused the family to divide into two camps. There are those who like real maple syrup and those who don’t. The score is two to four by the way. I will leave you guessing which is which.

With one of the children interested  in making more than just a couple of pints of syrup this year, we upped the ante to eight buckets on varying trees. Not trying for that business level, but definitely willing to put more effort into it than previous years. Grandpa pitched in with a loan of spiles and sap buckets with lids. We are moving up(!) from our years of milk jugs, open buckets, and spiles made from our elderberry tree.


As usual, we had good intentions, but it took us awhile to gather it all together and get out there. The unexpected early warm weather was not helping those who procrastinated either. But we did get out there and collected it faithfully twice a day, even if it meant working by flashlight. Oh the anticipation of the unknown, what will you find? Will the sap level be a fulfilling surprise or a little disappointing? Why is the unknown of a sap bucket something to look forward to, but the unknowns in life bring frustration, worry, and anxiety? Hmmm... I might need to think about that awhile. Even the adults enjoyed the twice a day dose of "Christmas" expectancy that happened when the sap lid was slid back to reveal the contents within. Oh Lord, please help me "see" and enjoy the small daily wonders that You have placed  in Your world for me to discover and find amazement in. Help me not to rush through life and overlook the personal touches of Your love that You have surrounded me with.

Usually we boil the sap most the way down over the wood stove in the basement, bringing it up stairs to cook down once it reaches the stage of careful watching. However the warm weather was working against that plan, and most of it was boiled down in our kitchen. We tried to use the wood cook stove one day, but ended with roasted people long before we ever got to the end of boiling the syrup.


The day with the biggest haul of sap started out with sparks of delight in my son's eyes, and ended with fiery darts shooting from my eyes. I fell asleep and woke up to a house full of smoke caused by the maple syrup I had charred. It was so bad I am still not sure I can save the pan. I was sooo mad at myself for ruining my son's joy, but thankfully he is like his Dad so his only comment was, "It is just syrup, Mom."


We have brought our syrup making season to a close with the total of seven pints this year. The total would of been much higher if mom hadn't of tried to make burnt offerings. The boys got to visit their second cousin's real sap operation which has fed the dreams and plans for next year. Along with visions of using Grandpa's long sap pan that was found in a shed.

There is a sadness in knowing Grandpa's sap making days have gone, but also a joy in knowing that a grandson is interested in not only hearing the stories of old but of working towards carrying on a tradition. Seeing my son hand Grandpa a pint of syrup made from this spring's sap run was truly a moment of sweetness for me.


Monday, March 21, 2016

Rawhide Ramblings

Creativeness and the love of learning new things is something that has deep roots in many of my family members. Some years ago my husband had the longing to try to make some parfleche items (items made from raw hide). Parfleche is a French word the trappers and traders used to describe these items, not what the Native Americans themselves called them. Obviously, there are not many books on this at the local library, and it was back in the days before so much information was available online. So after doing what research he could on line and acquiring some gorgeous adult “picture” books on  parfleched items.  He was ready to try his hand at making something.   He made a knife sheath which I thought turned out rather cool. Remember I am not biased or anything, just a loving, supportive wife. lol


He also studied about and made one flat case with long braintan fringe (Probably reserved for special items) , one parleche envelope (Though these were usually made in pairs from the rump of the animal.) These were his first attempts and they have traveled to different events to be shared with people, but  those who I love sharing the history about them  most  are children.  Opening the envelope up and explaining that this would have been like a suitcase that they might of traveled with or kept their possessions in, and then asking the children how many of their toys and treasures would it hold really awakes a child’s visual image of differences between the mass of possessions we accumulate today to the few and dear things treasured in the past. I always tell them to look for the parfleche items in the old pictures. Explaining that sometimes they will be leaning up against something and sometimes stacked up so you only see them from the side.


Rawhide can come from different animals. My husband used cow, however I do have one small flat case that he made from Caribou raw hide.  It is much softer. My research has told me that  buffalo rawhide is much more pliable then cow and would have made better envelopes and flat cases. (I hope to some day actually feel the difference with my own hands.) Sadly, once the Native American people were confined and no longer had access to the buffalo they started making rawhide trunks and boxes from cow hides. (The quality of their work was still amazing!) This is probably the result of two things. One, the cow raw hide available to them was much stiffer and worked better for trunks and boxes, and two, they were forced to leave their nomadic style of life which benefited by the use of the flat cases and envelopes instead of the rectangle shaped boxes and trunks.

I can't say that my husband ever got into making many prafleche items, but the few he did make encouraged me to learn the history about them, and appreciate the work that went into them. When I study the pictures of the original parfleche work I marvel at the artistic ones (usually women) who found a way to bless their world with beautiful, personalized, and useful items.

According to the book The American Indian Parfleche by Gaylord Torrence: "These beautiful containers are most closely associated and probably originated with the peoples of the Great Plains, where they were integral to the nomadic way of life, providing a means to store and transport a family's food and possessions. They were made by women from more than forty tribes..."

Note: I am not Native American. I live in the Eastern part of the United States of American. I love history and have done some research on the Parfleche items used is the west, however I am limited to what knowledge I can find in books so if you have better knowledge about any of these items or know how to link me up with a more accurate source of knowledge please share with me. I am always learning, and am very much aware that some of what is recorded in the old books is not always labeled and described correctly.

                                                 
                                                             A mini one just for fun.

Monday, February 29, 2016

The Craze of Colored Potions (Dyeing Wool)


Oh how deep I have fallen into the fiber hole. First, I learned to knit. Then, I mastered making my own yarn on a drop spindle. Obviously, the next step is to own a spinning wheel. Wait, two are better than one right? Wool comes from sheep so let’s add a few sheep to the farmette. Turn around twice and a few sheep becomes close ten, and oh, spring lambing will multiply that number. Sheep mean work, daily care, lambing, hoof trimming, the chore with the biggest learning curve—shearing,  washing, picking clean, and carding my wool. Woe! There is a lot of time involved it that. Maybe some years it makes sense to send the wool out for processing.

Now that all the work is done, it is time for the magic to begin. Dump, pour, swish, and dabble, add warmth and patience, now the color is no longer in my potion but has transferred itself onto my wool. The magic of it is contagious. No, I don’t always get it right. Surprises can be both good and bad. I believe there are enough dyeing methods to keep me busy learning the rest of my life. I feel a little witch like concocting my potions, I better practice my evil laugh.

 I’ve only been using food dyes, but know that the colored potions hole will be both deep and wide. No, this is not a neat, tidy project, but through pictures and explanations of them I hope you will be able to catch some of the magic of it.


Supplies: What I use 1. Wood cook stove with
                                     warming shelf.
                                2. Two quart glass jar or
                                     jars.
                                3. Vinegar and water.
                                4. Kool aid packets or
                                    Wilton icing colors
                                5. Soup can and plastic
                                                                   
                                                                            clothes hanger.
                                                                                                 6. Glass casserole dish

Step One: Fill jar about 3/4ths full of water with a swish of vinegar added to it. I never measure either of these exactly. Put in lots of Kool aid  packets (can even mix colors) or a dab of Wilton icing color. Put lid on jar and shake until mixed well.  Should look dark like above picture. You can no longer see through the jar.


Step Two: Skein or loop your yarn around two chair backs and tie it so it will not tangle. It will be in a big long loop like later pictures show. Now put it into the jar. The flash makes the yarn show up inside the jars better than it does in real life. Push in down so it is all covered by the dye.


Step three is patience let it sit. I usually let mine sit all night. In the morning I wake up to a jar of  colored yarn sitting in almost clear water. The yarn will only hold so much dye so if there is still dye in your water remove yarn and place more yarn in the dye jar.


Here are pictures of the yarn in the morning. Notice the clear water in the jar. *Note* Jar
on far right in left picture has nothing to do with dyeing. lol It is a science experiment.


This is a picture of the wet yarn. I ring it softly out by hand. You can see the almost clear water in the bottom of the bowl.


The next step is to hang, weight the wet yarn, and let it dry.  Here is where I use the hanger and soup can. In the picture you can see that I have plenty of dye left in my jar for another round of dyeing.  Also, it is interesting that the cotton yarn I used to tie the wool doesn't really take the dye. You need to use another method for dyeing cotton.


The last Step happens after the yarn is dry. I lay it in a glass casserole dish and place in my oven of wood cook stove for ten minutes at the temp of 250 degrees. I set the timer for five minutes, turn the yarn over in the dish at that point, and set the timer for another five minutes.You are only suppose to have to heat treat it once to make the color fast. Just for good measure I heat treat it two mornings in a row. I do it in the mornings while my fire is still warming up. After all that work I don't want to burn it.


On the left are two yarns dyed in the same dye batch. Lighter one was a white hand spun "unknown" wool and the darker one was a gray Finn wool just like I  used in my son's Christmas hat this year. Only it is spun finer.        .                                                                                                                                                        
The yarn in the right picture is hand spun white Icelandic.
 I made a big skein or loop of it and dipped different parts
of it into three different dye jars. Thus making a multi colored
yarn.                                                                                        

The far left yarn is naturally gray wool dye with blue Kool Aid packets. It might be hard to really see here, but it came out a cool denim color. On right yarn I used red Kool Aid packets over gray yarn and got a wonderful, earthy red heather.


You may even dye the wool roving like in the picture
below on the right.


 The left show a picture of three balls of  gray Finn wool that where spun and dyed with Wilton coloring. Notice the subtle shade difference. These can be a real plus. When you ply them to gather you get the heathered green yarn in the picture below.


Below is a picture of a project I am making with four plys of the red heathered yarn mentioned above. The neat thing about this picture is the yarn was originally the same color as the gray yarn in this picture before I dyed It.


Everyone has their own favorites. Mine are: I prefer to dye a single strand of yarn before it is plied. Dyeing over a light grey gets me the colors I like best. But I am in no way done learning yet so that may change. 

Have I made you want to mix up your own magic potions?


Sunday, February 28, 2016

Handmade Braintan Drum Pincushion

Years ago I saw an ad in one of the Interweave Press Pieceworks magazines for a pincushion contest. As usual, my brain fired off an image of something totally different than what they were asking for, but I thought why not give it a go. What could it hurt? So I let the idea roll around in my head till I thought I had a workable idea. I then made a phone call to my Dad, asking his advice. Was my idea even doable? He thought I could do it, and offered to  make the tinwork for me, but was more than willing to help me once I said that I wanted to do the work myself. Now I had to block out a time slot in my schedule to spend a day in Dad’s tin shop to make the first step of my “pincushion”. What? You ask, why in the world would you need to work in a tin shop to make a pincushion for a needle work contest? But when making a mini drum you need a form, yes, usually the hoop is wooden. But since my Father has a tin shop it would be easier and more fun to make it out of tin. Basically I made a tin can, with a lot of little quirks added to it.

I wanted both sides of the drum to be filled with raw wool because that is what was used in pincushions years ago. Running the pins through the raw wool coated them with a thin layer of lanolin which caused them not to rust from the moisture in the homes.  Yet I also wanted the drum to have some weight to it. Just a can filled with wool would easily side around on your work space. To fix this problem I had to create an area in the middle of the can that was sealed and would hold the sand that would give my mini drum weight. Another personal touch to the can was using a tool from the tin era that had been lost until my Dad drafted up the design and had a few of them remade. I got to choose a simple but decorative design of ridges that run around my can. This could be done the hard way, but by using the tool Dad had remade it was easy. (Extra cool! Dad) The last step to the can was to pre-age it so it didn’t look shiney and new, but had an heirloom look to it.


Now I had to design the drum’s top. I wanted the top to have two colors of braintan arranged in a pattern. I pieced it together and then took blue wool sock yarn and did a simple embroidery stitch over the top of the seams. Now for the very center of drum top, a very small beaded rosette in red and white beads gives it a special touch while also covering the area where all my seams come together and could damage a needle if it was forced through them. The bottom piece of braintan is the very same size and shape as the top only it is all one piece.


Most drums have a cord or leather thong that laces through the top and bottom as it travels around the drum. I wove a mini, chevron finger woven strap made out of red, white, blue wool sock yarn to use on my pincushion drum. I tell myself this is because I wanted to add color, but I am pretty sure it was just to keep the project as difficult as I could. ; ) The finishing touches where adding a feather and a few brass beads.


Yes, I did send it in to the contest. lol They probably had no idea how to “grade” it. My drum pincushion arrived home again with a nice letter stating I didn’t make it into the few top spots that would be recognized in their magazine. No surprise to me really.


Today as the loss of my Father is very fresh in my life, (The evening of the 7th of February my Dad took his first stroll in heaven.)  I look at this mini drum cushion which brings sadness, yet joyful memories of a life long relationship with a man who taught me so much. Thanks Dad for believing in me and giving me the confidence to follow my own drum beats.